
MS Paint Guide is a practical introduction to one of the simplest and most useful graphics programs available on Windows. MS Paint, commonly called Paint, is a basic image-editing and drawing application that allows users to create pictures, edit screenshots, add text, crop images, draw shapes, change colors, and perform many everyday image-related tasks without needing advanced design software.
For students, beginners, teachers, office users, and competitive-exam aspirants, learning MS Paint can be useful because its interface is simple and its tools are easy to understand. It is also a common topic in basic computer knowledge, digital literacy lessons, school computer classes, and computer awareness sections of various examinations.
This MS Paint Guide explains the program from the basics to practical use. It covers the meaning of MS Paint, its interface, important tools, drawing techniques, text and shape options, image editing, file formats, keyboard shortcuts, practical applications, common mistakes, and exam-oriented points. The aim is to help a beginner understand not only what each tool does, but also when and how to use it.
- MS Word Tutorial
- MS Excel Tutorial
- MS PowerPoint Tutorial
- MS OneNote Turorial
- Excel Basic Functions: Complete Guide, Formulas, Examples & Tips
- How to use VLOOKUP and XLOOKUP in Excel Step by Step
What Is MS Paint?
MS Paint is a basic raster graphics application used to create, view, and edit simple digital images. It is designed for tasks such as freehand drawing, coloring, cropping, resizing, rotating, adding text, creating shapes, and making simple image corrections.
Unlike professional graphics applications, Paint focuses on straightforward image creation and editing. A user can open an existing picture, make changes, and save the edited image in a suitable format.
For example, suppose a student takes a screenshot of an online application page and wants to highlight an important field. The student can open the screenshot in Paint, use the pencil, brush, shape, or text tools to mark the required area, and save the edited image.
Simple Definition
MS Paint is a basic Windows drawing and image-editing program used for creating and modifying digital pictures.
What Does MS Paint Stand For?
The term “MS Paint” commonly refers to Microsoft Paint. “MS” is associated with Microsoft, while “Paint” describes the program’s primary drawing and image-editing purpose.
Why Is MS Paint Important for Students?
MS Paint is useful for beginners because it teaches fundamental concepts of digital images without requiring advanced design knowledge. Before learning complicated graphics software, students can use Paint to understand basic ideas such as pixels, colors, selection, shapes, image dimensions, and file formats.
It can also help students complete simple classroom and computer-lab activities.
Common student uses include:
- Drawing diagrams and simple illustrations
- Creating basic posters
- Editing screenshots
- Adding labels to images
- Making simple flowcharts
- Cropping photographs
- Resizing images
- Practicing mouse control
- Understanding basic computer graphics
- Creating simple project illustrations
For competitive-exam aspirants, knowledge of Paint can be useful in basic computer awareness questions. Questions may ask about drawing tools, selection tools, file formats, color functions, keyboard shortcuts, or the general purpose of Paint.
MS Paint Overview
The following table provides a quick overview of the program.
| Topic | Explanation |
|---|---|
| Software | Microsoft Paint |
| Main purpose | Creating and editing simple images |
| Image type | Raster/bitmap graphics |
| Basic input | Mouse, touch, or compatible pointing device |
| Common tools | Pencil, brushes, shapes, fill, text, eraser |
| Editing tasks | Crop, resize, rotate, select, copy, paste |
| Text support | Text can be inserted into an image |
| Color support | Foreground and background colors can be selected |
| Common uses | Drawing, screenshot editing, simple image adjustments |
| Target users | Beginners, students, teachers, and general users |
Feature availability and interface details can differ between Windows versions, so users should refer to the version installed on their computer when a particular option appears different.
How to Open MS Paint in Windows
Opening Paint is straightforward.
Method 1: Using Windows Search
- Open the Windows Search option.
- Type Paint.
- Select the Paint application from the results.
- The Paint window will open.
Method 2: Using the Run Dialog
- Press Windows + R.
- Type
mspaint. - Press Enter.
- Paint should open.
This method is useful when studying computer shortcuts because mspaint is a commonly used command for launching Paint.
Method 3: From an Image File
On many Windows installations, you can right-click an image and choose an option such as Open with, followed by Paint, when Paint is available as an associated application.
Understanding the MS Paint Interface
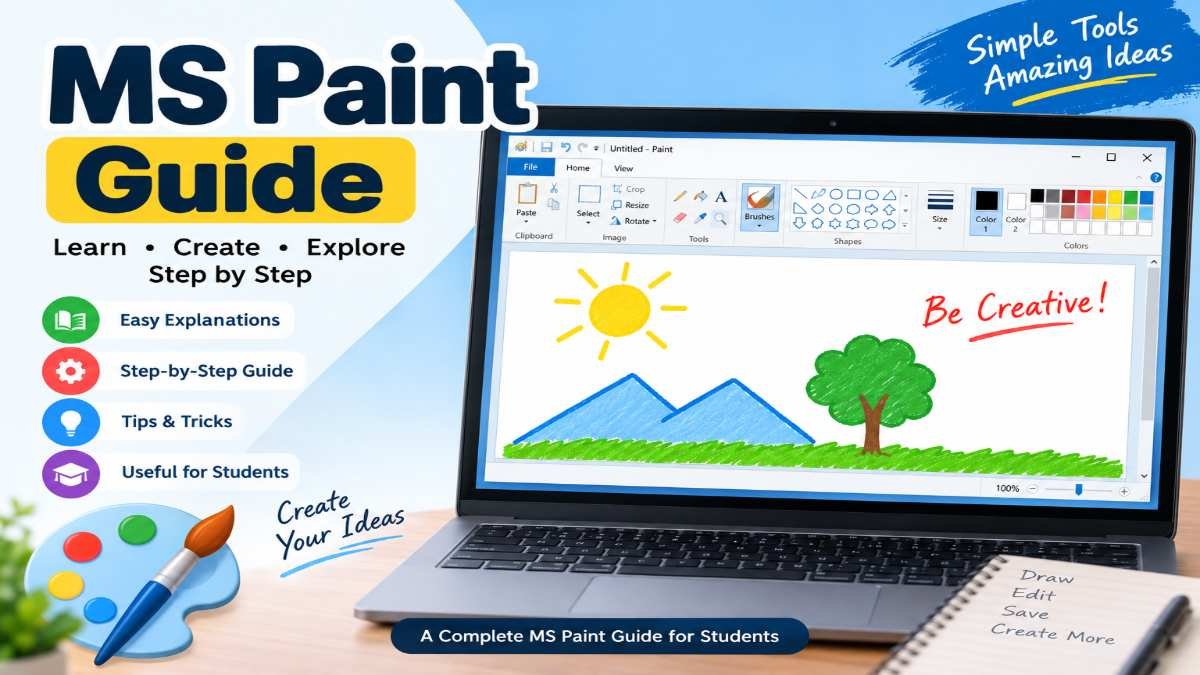
The MS Paint interface is designed to keep common drawing and editing functions easily accessible. Although the appearance can differ across Windows versions, beginners will generally encounter areas for commands, tools, colors, the drawing canvas, and image controls.
Title Bar
The title bar identifies the open application and, depending on the Windows version, may show the current file name.
Toolbar or Ribbon Area
This area contains the drawing, editing, image, and color-related controls. The exact organization may vary between versions.
Drawing Canvas
The canvas is the main workspace where you create or edit an image. It represents the area in which pixels are modified.
Color Section
The color controls allow users to choose colors for drawing, shapes, text, and other supported operations.
Status Information
Depending on the version, the bottom area may provide information such as image dimensions or zoom-related details.
Important MS Paint Tools and Their Uses
Understanding the tools is the most important part of any MS Paint Guide. Each tool performs a specific function.
| Tool | Main Use |
|---|---|
| Pencil | Drawing thin freehand lines |
| Brushes | Drawing with different brush effects or widths |
| Eraser | Removing parts of a drawing |
| Fill with Color | Filling an enclosed area with a selected color |
| Color Picker | Selecting an existing color from the image |
| Text | Adding written content to an image |
| Line | Drawing straight lines |
| Curve | Creating curved lines where supported |
| Rectangle | Creating rectangular shapes |
| Ellipse | Creating circles and oval shapes |
| Polygon | Creating multi-sided shapes |
| Rounded Rectangle | Creating rectangles with rounded corners |
| Select | Selecting an area of the image |
| Crop | Removing unwanted outer portions |
| Resize | Changing image dimensions |
| Rotate | Rotating or flipping the image |
Pencil Tool
The Pencil tool is designed for freehand drawing. It generally produces a narrow line and is useful when precise pixel-level drawing is required.
For example, when creating a simple pixel-style diagram, a student may use the Pencil tool to draw small lines or manually modify individual areas.
The Pencil tool is best suited for:
- Small drawings
- Pixel-level corrections
- Outlines
- Simple sketches
- Basic handwriting with a mouse or touch input
Because the line is typically thin, it may not be the best choice for large or bold illustrations.
Brush Tool
The Brush tool provides a more noticeable stroke than the basic pencil. Depending on the Paint version, multiple brush styles may be available.
Brushes are useful for:
- Freehand illustrations
- Coloring
- Decorative strokes
- Bold outlines
- Creative drawings
A student drawing a simple landscape can use a brush for trees, clouds, or broad colored areas.
Eraser Tool
The Eraser removes or modifies portions of an image by replacing the selected area with the canvas background or another applicable result.
A common beginner mistake is to assume that the Eraser works like a professional layer-based editing tool. Paint has traditionally worked directly on the image itself, so erased content may not be recoverable unless the user uses Undo or has another copy.
Fill with Color Tool
The Fill with Color tool is used to fill an enclosed area with a selected color.
For example, imagine drawing a circle and wanting to make its inside blue. When the boundary is properly closed, the fill tool can color the enclosed area.
Why Does the Fill Tool Sometimes Color the Wrong Area?
The most common reason is a gap in the boundary.
Suppose a student draws a rectangle but leaves a tiny opening in one corner. When the fill tool is used inside the rectangle, the color may spread outside because the program does not recognize a completely enclosed region.
Therefore, always check whether the outline is closed before applying a fill.
Color Picker Tool
The Color Picker, also called the eyedropper in many graphics programs, allows users to select an existing color from an image.
For example, suppose a picture contains a specific shade of green and the user wants to draw using exactly the same shade. Instead of manually guessing the color, the user can pick that color from the image.
This tool is particularly useful when matching colors in diagrams or correcting small sections of an image.
Text Tool
The Text tool allows users to type words or sentences directly onto an image.
A student can use it to add:
- Titles
- Labels
- Captions
- Diagram names
- Instructions
- Notes
- Basic poster text
After selecting the text area, users can usually adjust available text properties such as font, size, or formatting depending on the Paint version.
Example of Using the Text Tool
Suppose you create a diagram of the water cycle. After drawing the main elements, you can use the Text tool to label:
- Evaporation
- Condensation
- Precipitation
- Collection
This turns a simple drawing into an educational diagram.
Line Tool
The Line tool creates straight lines. It is useful for technical diagrams, tables, arrows, borders, and simple illustrations.
Students often find it easier to create neat diagrams with a line tool than by dragging the mouse manually.
Holding a modifier key such as Shift may constrain drawing to certain angles in compatible versions and contexts, but exact behavior can vary. For exam preparation, focus on the core purpose: the Line tool is used to draw straight lines.
Shape Tools
MS Paint provides several basic shapes, although available options can vary by version.
Common shapes include:
- Rectangle
- Ellipse
- Polygon
- Rounded rectangle
- Lines and related shape tools
Shapes are valuable for educational diagrams because they provide cleaner geometry than freehand drawing.
Rectangle
A rectangle can be used to create boxes, labels, flowchart components, buttons, and simple diagrams.
Ellipse
The Ellipse tool creates oval or circular shapes. It can be useful for wheels, faces, symbols, bubbles, and diagram components.
Polygon
A polygon consists of multiple connected sides. It is useful when a shape needs more than four sides.
Selection Tool
The Selection tool allows the user to select a particular area of an image.
Depending on the available options, selection may be rectangular or free-form.
Once an area has been selected, the user can perform operations such as:
- Copy
- Cut
- Paste
- Move
- Delete
- Resize or manipulate the selected portion, where supported
Selection is one of the most important concepts in image editing because it lets users work on one part of an image without manually redrawing everything.
Example
Imagine a student draws a triangle but places it too far to the left. Instead of deleting the entire picture, the student can select the triangle and move it to a more suitable location.
Crop Tool
Cropping removes unwanted outer portions of an image.
For example, suppose a screenshot contains a large amount of blank space around the useful content. Instead of resizing the entire image, the user can crop away the unnecessary area.
A good cropping process is:
- Open the image.
- Select the area that should remain.
- Choose the Crop command.
- Review the result.
- Save the edited image using a suitable file name.
Cropping is especially useful for preparing screenshots for school notes, presentations, assignments, and websites.
Resize Tool
Resize changes the dimensions of the image.
Two common ways to think about image size are:
- Percentage: the image becomes larger or smaller relative to its current dimensions.
- Pixels: exact width and height values are entered.
For example, an image measuring 1600 × 900 pixels can be reduced to 800 × 450 pixels while maintaining its 16:9 proportion.
Why Is Maintaining Aspect Ratio Important?
Aspect ratio describes the relationship between width and height. If the width changes without proportionally adjusting the height, the image may look stretched or compressed.
For example:
Original: 1200 × 675
Same proportion at a smaller size: 800 × 450
Both have the same 16:9 ratio.
Rotate and Flip
Rotate changes the orientation of an image.
Common operations include:
- Rotate 90 degrees
- Rotate 180 degrees
- Rotate 270 degrees
- Flip horizontally
- Flip vertically
Practical Example
Suppose a photograph was captured sideways. The Rotate function can correct its orientation.
Flipping can be useful when creating a mirrored version of an illustration.
Working With Colors in MS Paint
Color selection is an important part of drawing and editing.
Users can choose colors for:
- Pencil strokes
- Brush strokes
- Shapes
- Filled regions
- Text
- Other supported drawing operations
A good beginner exercise is to create a color chart containing primary, secondary, and mixed colors.
Foreground and Background Concepts
Traditional Paint workflows distinguish between the primary drawing color and a secondary/background color. Mouse-button behavior and exact interface presentation can differ depending on the version.
For beginners, the practical idea is simple: one selected color is used for the main drawing operation, while another may be used in supported background or secondary-color functions.
How to Create a Simple Drawing in MS Paint
Creating a basic drawing helps students understand how multiple tools work together.
Suppose you want to make a simple house.
Step 1: Open Paint
Launch Paint and create a new blank canvas.
Step 2: Draw the Main Structure
Use the Rectangle tool to make the walls.
Step 3: Create the Roof
Use the Line or Polygon tool to create the roof.
Step 4: Add Door and Windows
Use small rectangles for the door and windows.
Step 5: Add Color
Use the Fill with Color tool to fill the walls, roof, door, and other enclosed regions.
Step 6: Add Details
Use the Pencil or Brush tool for small details such as grass, a sun, clouds, or a pathway.
Step 7: Add Text
Use the Text tool to add a title such as “My House.”
This simple activity teaches selection, shapes, colors, text, and drawing in one exercise.
How to Edit a Screenshot in MS Paint
Editing screenshots is one of the most practical uses of Paint.
Suppose you take a screenshot of a webpage and need to highlight a particular button.
The process can be:
- Open the screenshot in Paint.
- Crop unnecessary portions.
- Select a suitable shape tool.
- Draw a rectangle or another marker around the important area.
- Add text if an explanation is required.
- Save a new copy.
This technique is useful for students preparing tutorials, teachers creating instructions, and office users explaining software steps.
How to Add Text to an Image
To add text:
- Select the Text tool.
- Click and drag to create a text area.
- Type the required words.
- Adjust the available font and formatting options.
- Position the text appropriately.
- Review the image before saving.
Tips for Better Text Placement
Keep enough empty space around text so that it is readable. Avoid placing dark text over a dark background or very small text over a complicated picture.
For educational diagrams, labels should be clear and consistent.
How to Copy and Paste an Image or Selected Area
Copy and paste can save significant time.
A typical workflow is:
- Select the required image region.
- Choose Copy.
- Move to the desired location or another open image.
- Choose Paste.
- Position the copied content.
Keyboard shortcuts make this process faster:
- Ctrl + C — Copy
- Ctrl + V — Paste
- Ctrl + X — Cut
These shortcuts are also useful beyond Paint and are worth memorizing for general computer knowledge.
MS Paint File Formats
Paint can work with common image formats, though the exact list and capabilities depend on the Windows version.
Common formats associated with Paint include:
| Format | General Characteristics |
|---|---|
| PNG | Suitable for graphics, screenshots, and images requiring transparency support |
| JPEG/JPG | Common for photographs and compressed images |
| BMP | Bitmap format with comparatively simple image storage |
| GIF | Commonly associated with simple graphics and limited-color images |
| TIFF | Used for certain image workflows and may be supported depending on version |
Which Format Should Students Use?
For screenshots, diagrams, and graphics where clear edges matter, PNG is often a practical choice.
For photographs where smaller file size is important, JPEG may be more suitable.
The best format depends on the purpose, image content, and required quality.
Saving an Image in MS Paint
Saving is essential because Paint edits are not a substitute for keeping backup copies of important original files.
A basic process is:
- Open the File menu or equivalent save option.
- Choose Save or Save As.
- Select a location.
- Enter a clear file name.
- Select an appropriate format when required.
- Save the image.
Save vs Save As
Save generally updates the current file.
Save As allows the user to create a new file, select another location, or use another supported format.
For important original images, using Save As to create a separate edited copy is often safer than immediately overwriting the source file.
Useful MS Paint Keyboard Shortcuts
Keyboard shortcuts can make common tasks faster and are particularly useful for students preparing for computer-awareness exams.
| Shortcut | Function |
|---|---|
| Ctrl + N | New |
| Ctrl + O | Open |
| Ctrl + S | Save |
| Ctrl + Shift + S | Save As, where supported |
| Ctrl + C | Copy |
| Ctrl + X | Cut |
| Ctrl + V | Paste |
| Ctrl + Z | Undo |
| Ctrl + Y | Redo |
| Ctrl + A | Select all |
| Ctrl + P | |
| Ctrl + E | Image properties or related function in compatible Paint versions |
| Ctrl + W | Close current window/document in supported contexts |
| Delete | Delete selected content |
Because shortcut support can differ between versions and system contexts, students should practice these commands in the version they use.
MS Paint for Computer Exam Preparation
MS Paint can appear in basic computer knowledge questions, particularly when an examination tests fundamental software awareness.
Important areas to study include:
- Purpose of MS Paint
- Meaning of image editing
- Drawing tools
- Pencil and Brush tools
- Eraser
- Fill tool
- Color Picker
- Text tool
- Shape tools
- Selection
- Crop
- Resize
- Rotate
- Common keyboard shortcuts
- Basic image formats
Typical Exam Question Examples
Question: Which tool is used to fill an enclosed area with color?
Answer: Fill with Color tool.
Question: Which tool allows you to select a color already present in an image?
Answer: Color Picker tool.
Question: Which command removes unwanted outer portions of a picture?
Answer: Crop.
Question: Which shortcut is commonly used to save a file?
Answer: Ctrl + S.
Question: Which tool is generally used to add words to an image?
Answer: Text tool.
These questions are simple, but students sometimes lose marks because they confuse the names and purposes of similar tools.
MS Paint vs Other Graphics Software
MS Paint is useful for basic tasks, but it is not designed to replace professional graphics programs.
| Feature | MS Paint | Advanced Graphics Software |
|---|---|---|
| Beginner-friendly | High | Depends on software |
| Basic drawing | Yes | Yes |
| Simple image editing | Yes | Yes |
| Advanced layers/workflows | Limited or version-dependent | Generally extensive |
| Professional photo editing | Limited | Available in specialized programs |
| Vector graphic creation | Not its main purpose | Available in dedicated applications |
| Advanced effects | Limited | Extensive |
| Learning curve | Low | Often higher |
The important point is not that one application is universally better than another. The suitable tool depends on the task. Paint is practical when the requirement is simple drawing or quick image editing.
Advantages of MS Paint
MS Paint has several advantages for beginners.
Easy to Learn
The basic tools are easy to understand. A student can start drawing after only a short introduction.
Useful for Quick Editing
For simple cropping, resizing, marking, or annotation, Paint can be faster than opening advanced design software.
Good for Basic Computer Practice
Students can learn mouse control, menu navigation, selecting objects, saving files, and using keyboard shortcuts.
Suitable for Simple Diagrams
Flowcharts, labels, arrows, shapes, and basic illustrations can be created without specialized design knowledge.
Helpful for Screenshot Annotation
Paint provides an easy way to mark screenshots and explain specific parts of an interface.
Limitations of MS Paint
Paint also has limitations.
It is not intended to be a complete professional design environment. Users creating complex illustrations, sophisticated photo composites, advanced typography, or professional publishing materials may need specialized applications.
Other limitations may include:
- Limited advanced editing workflows
- Limited professional color-management capabilities
- Fewer sophisticated effects than dedicated editors
- Less control for complex projects
- Reduced suitability for professional graphic production
This does not make Paint useless. It simply means that software should be selected according to the task.
Practical Applications of MS Paint
Although Paint is a basic program, it can be useful in many everyday situations.
Education
Students can create diagrams for subjects such as science, geography, and computer studies.
Classroom Projects
Simple posters, labeled drawings, and project illustrations can be prepared quickly.
Screenshot Instructions
Teachers and students can highlight specific buttons or fields on screenshots.
Office Work
Basic image cropping, resizing, and annotation can be performed without installing advanced editing software.
Personal Use
Users can make simple greeting cards, sketches, image annotations, and basic edits.
How Students Can Practice MS Paint
The easiest way to become comfortable with Paint is to practice small tasks rather than trying to memorize every tool at once.
A useful practice sequence is:
Beginner Level
Start with:
- Pencil
- Brush
- Eraser
- Colors
- Shapes
- Fill tool
Create simple objects such as houses, trees, flowers, clocks, or geometric figures.
Intermediate Level
Practice:
- Selection
- Copy and paste
- Crop
- Resize
- Rotate
- Text insertion
Create labeled diagrams and annotated screenshots.
Advanced Beginner Level
Combine multiple tools.
For example, create a simple educational poster with:
- A title
- Shapes
- Colors
- Labels
- Arrows
- Small illustrations
The objective is not artistic perfection. The objective is to understand how different tools work together.
Common Mistakes Beginners Make in MS Paint
Mistake 1: Drawing Without Checking the Canvas
Beginners sometimes create an image without considering how much space is available.
Solution: Decide the approximate layout before starting.
Mistake 2: Using the Fill Tool on Open Shapes
A tiny gap can cause the color to spread into unwanted areas.
Solution: Check the outline carefully before filling.
Mistake 3: Overwriting the Original Image
Editing the original file directly can make recovery difficult.
Solution: Use Save As to create an editable copy before major changes.
Mistake 4: Stretching Images
Changing width and height independently can distort the picture.
Solution: Maintain the original aspect ratio whenever possible.
Mistake 5: Using Excessive Colors
A simple educational diagram can become difficult to read when too many colors are used.
Solution: Choose a small, consistent color palette.
Mistake 6: Placing Text Too Close to Edges
Text positioned near the edge may look crowded or become difficult to read after cropping.
Solution: Leave sufficient margin around important text.
Mistake 7: Forgetting to Save
A long drawing session can be lost if the file is not saved.
Solution: Save periodically using Ctrl + S.
MS Paint Tips for Better Results
Good results do not require advanced artistic skill. A few habits can improve the quality of your work.
Use shapes whenever precision matters. A rectangle created with the Rectangle tool will usually be cleaner than one drawn manually.
Use selection before moving objects. This prevents unnecessary changes to the rest of the image.
Zoom in when working on small details. A larger view makes pixel-level corrections easier.
Keep text readable. Choose a suitable size and avoid unnecessary decorative formatting.
Save a backup before making major changes. This is especially useful when editing an important screenshot or photograph.
Use descriptive file names such as science_diagram.png instead of vague names such as image1.png.
Understanding Pixels in MS Paint
MS Paint is based on raster graphics. A raster image is made up of small picture elements called pixels.
Think of a pixel as one tiny point in a digital picture. A large collection of pixels forms the complete image.
For example, an image measuring 1000 × 500 pixels contains 500,000 pixel positions.
This does not mean every pixel must necessarily have a unique visible color, but the dimensions indicate how many pixel positions exist across the width and height.
Why Do Pixels Matter?
When an image is enlarged significantly, individual pixels may become more noticeable. That can make edges appear less smooth.
This is one reason resizing an image to a much larger dimension can reduce its visual sharpness.
Image Dimensions and Resolution
Image dimensions describe the width and height of an image, commonly expressed in pixels.
For example:
1920 × 1080
means:
- Width = 1920 pixels
- Height = 1080 pixels
The word “resolution” is sometimes used more broadly, so students should distinguish image dimensions from concepts such as print resolution measured in pixels per inch.
For basic Paint work, understanding pixel width and height is usually sufficient.
Difference Between Raster and Vector Graphics
This is a useful concept for students interested in computer graphics.
Raster Graphics
Raster images are made from pixels. Paint primarily works with this type of image.
Examples include photographs and many screenshots.
Vector Graphics
Vector graphics are based on mathematical paths and shapes. They can often be scaled without the same pixelation associated with raster enlargement.
Professional vector-design software is typically used when precise, scalable shapes are required.
Understanding this difference can help explain why a simple Paint drawing behaves differently from artwork created in specialized vector software.
MS Paint and Digital Literacy
Learning Paint teaches more than drawing. It introduces students to several digital skills.
A beginner learns how to:
- Open software
- Navigate a graphical interface
- Select tools
- Use a pointing device
- Manage colors
- Edit digital content
- Save files
- Choose file formats
- Organize files
- Use keyboard shortcuts
These skills form part of basic computer literacy and can support later learning in word processors, presentation tools, spreadsheets, graphic editors, and other applications.
A Simple MS Paint Practice Project
A useful student exercise is to create a “Healthy Lifestyle” poster.
Step 1: Create the Background
Open a new image and decide how much space will be used for the poster.
Step 2: Add a Title
Use the Text tool to write “Healthy Lifestyle.”
Step 3: Create Shapes
Use circles, rectangles, and other shapes to represent water, fruits, exercise, and sleep.
Step 4: Add Colors
Use appropriate colors for each object.
Step 5: Add Labels
Place short descriptions beside each drawing.
Step 6: Review the Layout
Check whether any objects overlap or whether text is difficult to read.
Step 7: Save the Project
Use a meaningful file name, such as healthy_lifestyle_poster.png.
This exercise teaches several Paint features in a single project.
Important Points to Remember for Exams
For quick revision, remember the following associations:
| Concept | Remember It As |
|---|---|
| Pencil | Thin freehand drawing |
| Brush | Broader drawing strokes |
| Eraser | Removes drawn content |
| Fill | Colors an enclosed area |
| Color Picker | Selects an existing color |
| Text | Adds written content |
| Line | Creates straight lines |
| Rectangle | Creates rectangular shapes |
| Ellipse | Creates oval/circular shapes |
| Selection | Selects part of an image |
| Crop | Removes unwanted outer portions |
| Resize | Changes image dimensions |
| Rotate | Changes image orientation |
| Ctrl + C | Copy |
| Ctrl + X | Cut |
| Ctrl + V | Paste |
| Ctrl + Z | Undo |
| Ctrl + S | Save |
A simple memory technique is to group tools according to their purpose rather than memorizing them as one long list.
Draw: Pencil, Brush, Line, Shapes
Modify: Eraser, Fill, Color Picker
Manage area: Select, Crop, Resize, Rotate
Add information: Text
This grouping can make revision easier.
Frequently Asked Questions
What is MS Paint?
MS Paint is a basic Microsoft graphics application used to create, draw, and edit simple raster images. It can be used for drawing, coloring, cropping, resizing, adding text, creating shapes, and making basic image annotations.
What is the main use of MS Paint?
The main use of MS Paint is to create and perform basic edits on digital images. Common tasks include drawing, coloring, adding text, cropping, resizing, rotating, and editing screenshots.
Is MS Paint useful for students?
Yes. Students can use MS Paint for diagrams, project illustrations, labeled drawings, posters, screenshots, and basic computer practice. It is also relevant to computer-awareness preparation because questions may cover its tools and functions.
Which tool is used to fill an area with color in MS Paint?
The Fill with Color tool is used to fill an enclosed region with a selected color. The surrounding boundary generally needs to be closed to prevent the fill from spreading into connected areas.
Which tool is used to add text in MS Paint?
The Text tool is used to insert words or sentences into an image. Users can typically select a text area and adjust available font and formatting options.
How can I crop an image in MS Paint?
Open the image, select the portion you want to keep, and use the Crop command. The areas outside the selected region are removed from the resulting image.
How can I resize an image in MS Paint?
Use the Resize command and specify the required size, commonly using percentage or pixel dimensions. Maintaining the aspect ratio helps prevent the image from becoming stretched or compressed.
What is the difference between MS Paint and Photoshop?
MS Paint is primarily designed for simple drawing and basic image editing, while Photoshop is a professional graphics and photo-editing application with a much larger set of advanced tools and workflows. The appropriate choice depends on the complexity of the task.
What is the shortcut for saving a file in MS Paint?
The commonly used shortcut is Ctrl + S. It saves the current work when the command is supported by the application context.
Can MS Paint be used to edit screenshots?
Yes. Paint is suitable for many basic screenshot-editing tasks, including cropping, adding text, drawing boxes or arrows, highlighting information, and saving the modified screenshot.
Why does the Fill tool sometimes spread outside a shape?
This usually happens when the shape boundary contains a gap. The Fill tool recognizes connected areas, so even a small opening can allow color to spread into neighboring regions.
Can MS Paint create professional graphic designs?
Paint can create simple graphics and illustrations, but it is not primarily designed for complex professional graphic-design workflows. Users who need sophisticated editing, advanced compositing, or specialized design features may require dedicated graphics software.
Conclusion
MS Paint Guide is useful for anyone who wants to understand the basics of digital drawing and image editing without a complicated learning process. Paint introduces essential concepts such as pixels, colors, selections, shapes, text, image dimensions, cropping, resizing, rotation, and file formats.
For students, the application is especially valuable because it combines practical computer skills with simple creative activities. It can be used for diagrams, posters, screenshots, classroom projects, and basic image corrections. For competitive-exam aspirants, learning the purpose of common Paint tools and shortcuts can also strengthen basic computer awareness preparation.
The most effective way to learn MS Paint is through practice. Start with simple shapes and colors, then move to selection, text, image editing, and complete projects. Once the basic functions become familiar, Paint becomes a convenient tool for everyday image-related tasks and a useful foundation for learning more advanced graphics software.
5 thoughts on “MS Paint Guide: Tools, Features, Uses, Shortcuts & Student Tips”