
When you create a useful Excel sheet, the last thing you want is for the layout to change when you share it with someone else. Columns may get cut off, headings can move to another page, tables may become too small, and a sheet that looked perfect in Excel can suddenly look messy in the final document. That is why learning how to Convert Excel Sheet into PDF without losing formatting is a valuable skill for students, teachers, office workers, job aspirants, and anyone who regularly works with spreadsheets.
PDF is convenient because it keeps a document in a fixed layout. The person receiving it usually sees the same page arrangement that you prepared. However, simply clicking “Save as PDF” is not always enough. Excel first decides how the worksheet should be printed, and settings such as paper size, margins, orientation, print area, scaling, page breaks, and repeating rows can strongly affect the result.
The good news is that you do not need advanced Excel knowledge to get a clean PDF. Once you understand a few important settings, you can prepare a professional-looking file in just a few minutes. This guide explains the complete process, including the best settings, common mistakes, practical examples, and troubleshooting steps.
Visit More:-
- MS Word Tutorial
- MS Excel Tutorial
- MS PowerPoint Tutorial
- MS Paint Tutorial
- MS word Formatting Guide: Complete Guide to Format Word Documents
What Does It Mean to Convert an Excel Sheet into PDF Without Losing Formatting?
To Convert Excel Sheet into PDF without losing formatting means exporting the worksheet in a way that keeps the intended visual structure as closely as possible. This includes headings, tables, borders, column widths, row heights, fonts, colors, alignment, and other visible elements.
A PDF is not simply a picture of your spreadsheet. Excel has to divide the worksheet into pages before creating the PDF. That is why a sheet can look correct in Normal view but appear different in PDF or Print Preview.
For example, imagine you have a student marks table with eight columns. In Excel, all eight columns fit comfortably on your monitor. When you export it without checking the page settings, the last two columns might move onto another page. The data is still present, but the document is no longer easy to read.
The goal is therefore not just to create a PDF file. The goal is to prepare the worksheet for printing or PDF output first and then export it.
Why Is It Important to Convert Excel Sheet into PDF Correctly?
A properly formatted PDF is easier to read, print, share, upload, and archive. This matters because many spreadsheet files are created for people who may not have the same version of Excel or may not use Excel at all.
Students often create marksheets, project tables, attendance records, practical files, fee statements, or assignment schedules. Employees may prepare reports, salary sheets, sales records, inventory tables, invoices, and lists for their colleagues or customers. A clean PDF makes the information easier to understand without giving the receiver access to the editable spreadsheet.
There are several practical reasons to use PDF after preparing an Excel sheet:
- The page layout becomes fixed.
- The file is easy to share through email or messaging apps.
- The document can be printed on standard paper sizes.
- A PDF usually preserves the visible appearance better than sharing a spreadsheet alone.
- It is useful when a recipient only needs to read or print the information.
- It reduces the chance of accidental editing of the original worksheet.
Still, a PDF can only preserve what Excel is able to place correctly on the page. Poor print settings can produce a poor PDF. That is why the preparation stage matters.
Excel Settings You Should Check Before Creating a PDF
Before exporting the file, spend a minute checking the page layout. This small step prevents most formatting problems.
| Setting | What it controls | Recommended approach |
|---|---|---|
| Print Area | The cells that will be exported or printed | Select only the required data |
| Orientation | Portrait or landscape | Use landscape for wide tables |
| Paper Size | A4, Letter, Legal, etc. | Match the paper normally used |
| Margins | Space around the page | Use normal or narrow as needed |
| Scaling | How the sheet fits on pages | Fit wide sheets to one page |
| Page Breaks | Where a page ends | Adjust manually for important reports |
| Print Titles | Repeats headings on each page | Use for multi-page tables |
| Header/Footer | Adds document details | Use for page numbers or titles |
| Print Preview | Shows final page layout | Always check before export |
These settings are especially important when the worksheet contains a large table.
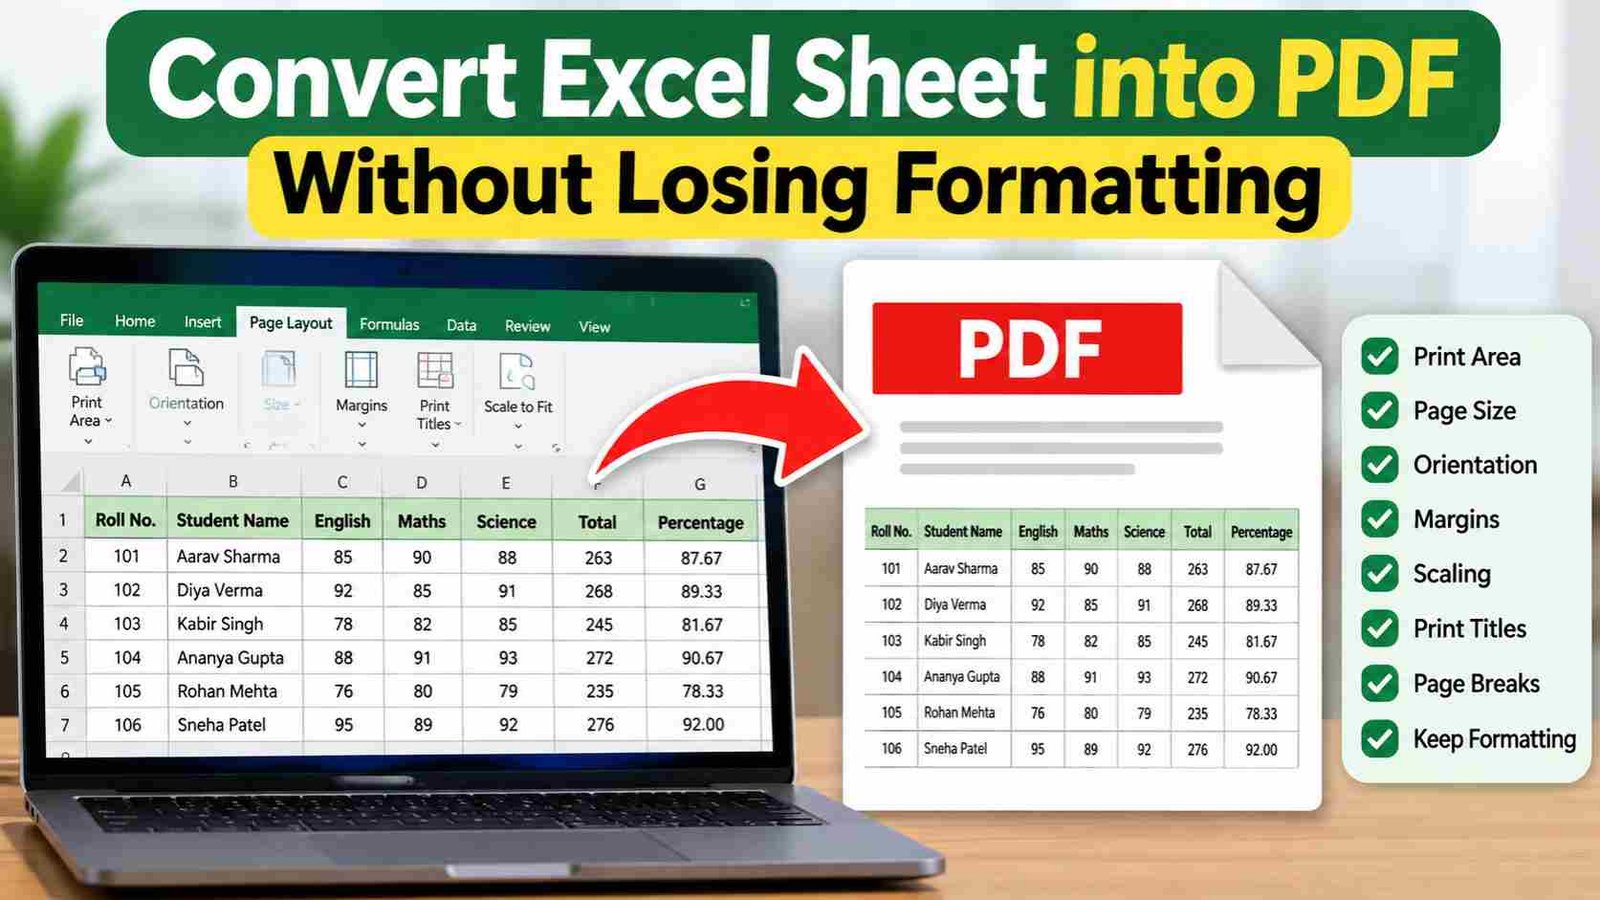
Step-by-Step: How to Convert Excel Sheet into PDF Without Losing Formatting
The exact buttons can vary slightly between Microsoft Excel versions, but the general process is similar.
Step 1: Open and review the Excel workbook
Open the workbook and go to the worksheet you want to export.
First check whether the sheet actually contains extra content outside the main table. Sometimes a user has accidentally typed something in a distant cell, which makes Excel treat a much larger area as the used range.
Look across the worksheet and identify:
- The main title
- Column headings
- Data rows
- Totals or summary rows
- Charts, if any
- Notes that need to appear in the PDF
Remove unnecessary content or formatting that should not be part of the document.
Step 2: Select the correct Print Area
If you want only a specific part of the worksheet in the PDF, setting the print area is one of the most useful steps.
Select the cells you want to include. Then go to the Page Layout tab and choose Print Area > Set Print Area.
For example, if your worksheet contains a table from A1 to H40 and some unrelated notes in columns J and K, setting the print area to A1:H40 prevents the unrelated cells from affecting the PDF layout.
You can later clear the print area through Page Layout > Print Area > Clear Print Area.
A common mistake is exporting the entire active sheet without realizing that extra content has expanded the printable region.
Step 3: Choose Portrait or Landscape orientation
Orientation decides whether the page is vertical or horizontal.
Portrait works well for narrow tables, letters, short lists, and documents with only a few columns.
Landscape is usually better for wide spreadsheets because the page becomes wider. This can help keep several columns on the same page.
Go to Page Layout > Orientation and choose the option that matches your worksheet.
For example, a four-column student list may fit well in portrait orientation. A marksheet containing subjects, internal marks, theory marks, practical marks, total, percentage, and grade may be easier to read in landscape.
There is no universal rule that every Excel PDF should use landscape. Choose the orientation that gives the best balance between readability and page count.
Step 4: Select the correct paper size
Paper size affects the available space on every page.
For many users, A4 is the practical choice, especially when the PDF may eventually be printed. Some workplaces or international documents may use Letter or another size.
Go to Page Layout > Size and select the required paper size.
If you prepare a worksheet using one paper size and later print it using another, the layout can change. Matching the Excel page size with the intended output paper is a simple way to avoid surprises.
Step 5: Adjust the margins
Margins create space between the worksheet content and the edge of the page.
Excel normally offers options such as Normal, Wide, and Narrow. You can also use custom margins.
If your table is almost fitting on one page, slightly reducing the margins may give you enough space without shrinking the data too much.
However, extremely narrow margins are not always a good idea. Some printers cannot print close to the physical edge of the paper, and the PDF may look cramped.
A good approach is to start with Normal margins and move to Narrow only when necessary.
Step 6: Turn on Wrap Text where needed
Wrap Text can solve a very common problem: long headings making columns unnecessarily wide.
Suppose you have a column titled “Educational Qualification Required.” If the entire phrase stays on one line, Excel may make that column very wide. Instead, use Home > Wrap Text for the heading cell.
The text can then appear over two or more lines while the column remains reasonably narrow.
This is particularly useful for:
- Long column headings
- Addresses
- Job descriptions
- Qualification details
- Remarks
- Notes
After turning on Wrap Text, check the row height. Excel usually adjusts it, but you should still inspect the result in Print Preview.
Step 7: Adjust column widths carefully
Column width has a major effect on PDF formatting.
If columns are too wide, the worksheet may span many pages horizontally. If columns are too narrow, text may be cut off or wrapped more than necessary.
Use the boundary between column letters to resize columns manually. Double-clicking the boundary can also AutoFit the column to its contents.
AutoFit is useful, but be careful when you have one unusually long cell. One long sentence can make the whole column much wider than you need.
For professional reports, manual adjustment often gives a better final result than blindly using AutoFit.
Step 8: Check row heights and hidden content
Look for unusually tall rows, hidden rows, hidden columns, or merged cells.
Merged cells can sometimes create unexpected page layout behavior. They are useful for titles but should be used carefully in complex tables.
Also check whether important information is hidden. Hidden rows and columns may not appear in the exported PDF as you expect.
If the document has filters applied, verify what data is currently visible before creating the final file.
How to Fit an Excel Sheet on One Page
One of the most searched Excel printing questions is how to fit a worksheet on one page. The best setting depends on whether the problem is horizontal width, vertical length, or both.
Go to the Page Layout tab and look at Scale to Fit.
You may see options for:
- Width
- Height
- Scale
For a wide table, setting Width = 1 page and leaving Height = Automatic is often a sensible starting point. This makes all columns fit across the page while allowing the rows to continue onto additional pages.
If the entire sheet is short enough, you can set both Width and Height to 1 page. But be careful: a large worksheet forced onto one page can become unreadably small.
The principle is simple: reduce the number of pages without reducing readability more than necessary.
When Should You Use “Fit Sheet on One Page”?
Use it when:
- The sheet is small.
- The content is intended to fit on a single page.
- The table is only slightly too large for the paper.
- Readability remains acceptable after scaling.
Avoid it when:
- The worksheet contains hundreds of rows.
- The sheet has many columns.
- The text becomes tiny.
- Readers need to inspect detailed information.
A two- or three-page PDF with readable text is usually more useful than a one-page PDF where everything looks miniature.
How to Repeat Excel Table Headings on Every PDF Page
When a table spans multiple pages, readers should not have to return to page one to remember what each column means.
Excel provides Print Titles for this purpose.
Go to Page Layout > Print Titles. In the Page Setup dialog, use Rows to repeat at top and select the row containing your column headings.
For example, if row 3 contains your headings, you can set row 3 as the repeating title row.
Now each printed or PDF page can show the same headings, making long reports much easier to follow.
This is especially helpful for:
- Attendance sheets
- Student marks
- Employee lists
- Inventory reports
- Exam-related tables
- Financial records
- Large data exports
It is one of the most useful features when you need to Convert Excel Sheet into PDF for a multi-page document.
How to Use Page Breaks for Better PDF Formatting
Excel automatically inserts page breaks based on the page size and scaling settings. Sometimes those automatic breaks are not placed where you want them.
You can use View > Page Break Preview to see how the worksheet is divided into pages.
The page boundaries help you identify problems such as:
- A heading appearing at the bottom of one page
- A total row separated from the table
- A single column being pushed to a new page
- A large blank area
- An awkward break in the middle of a small section
For important reports, manual page breaks can make the final PDF much cleaner.
For example, imagine a report contains a title, a summary table, a detailed table, and a final notes section. You may prefer the notes to begin on a fresh page rather than appearing under the last few rows of the detailed table.
Page breaks let you control that structure.
How to Check Excel PDF Formatting with Print Preview
Print Preview is one of the most important steps in the entire process.
Before exporting, go to File > Print. Excel will show you how the worksheet is expected to appear on paper.
Do not only inspect the first page. Move through all pages.
Check for:
- Cut-off columns
- Missing headings
- Excessive white space
- Tiny text
- Unexpected blank pages
- Broken tables
- Incorrect orientation
- Wrong margins
- Missing totals
- Charts that overlap data
- Footer or header problems
If something looks wrong in Print Preview, fix it in the worksheet or Page Layout settings before generating the final PDF.
This simple habit can save you from repeatedly creating and deleting PDF files.
How to Convert Excel Sheet into PDF on Windows
On Windows, Microsoft Excel normally provides several easy ways to create a PDF.
Method 1: Save As PDF
Open the workbook and choose File > Save As or Save a Copy, depending on your Excel version.
Select PDF as the file type.
Before saving, check whether the options allow you to choose:
- Active sheet
- Entire workbook
- Selected cells
Choose the option that matches what you want to publish.
For example, if a workbook contains separate sheets for January, February, and March, you should be careful not to export the entire workbook when you only need the January report.
Method 2: Export as PDF
Some Excel versions provide File > Export > Create PDF/XPS.
This method also lets you generate a PDF from the workbook while retaining the page layout you prepared.
The important thing is not whether you choose Save As or Export. The important thing is that you inspect the sheet’s print settings and PDF result.
Method 3: Print to PDF
Another option is to choose File > Print and select a PDF printer, such as a built-in “Print to PDF” option available on many Windows systems.
This can be useful when you want to control exactly what is printed.
However, remember that printing to PDF still depends on your worksheet’s print area, page settings, scaling, and preview.
How to Convert Excel Sheet into PDF on Mac
Excel on Mac also supports PDF export.
Open the workbook, review the page layout, and then use the available PDF option under the File menu or print dialog.
The exact interface can vary by Excel version and macOS version, but the key settings remain the same:
- Set the print area.
- Choose paper size.
- Select portrait or landscape.
- Adjust margins.
- Set scaling.
- Review every page.
- Export or print to PDF.
The final file should be checked just like a Windows-generated PDF.
How to Convert Excel Sheet into PDF Without Cutting Off Columns
Columns being cut off is one of the most common Excel-to-PDF problems.
The first thing to check is whether the sheet is too wide for the chosen paper size.
Try these solutions in order:
Use Landscape orientation
This provides more horizontal space.
Set Width to 1 Page
Under Page Layout > Scale to Fit, set the width to one page.
Reduce unnecessary column width
Look for columns that have extra empty space.
Wrap long headings
This can significantly reduce the width of columns.
Use Narrow margins
If the sheet is only slightly too wide, Narrow margins may solve the problem without excessive scaling.
Choose a larger paper size when appropriate
For some professional reports, a larger paper size may be more practical than shrinking the data.
The best solution is usually the smallest change that makes the worksheet fit while keeping the text readable.
How to Stop Excel from Creating Blank PDF Pages
Unexpected blank pages can happen for several reasons.
One common cause is content or formatting far outside the main data range. Another is a print area that includes empty cells.
To troubleshoot the problem, inspect the worksheet for:
- Accidental values in distant cells
- Extra formatting
- Large print areas
- Manual page breaks
- Hidden rows or columns
- Objects placed outside the main table
You can also check the print area under Page Layout > Print Area.
If a worksheet appears to have a huge used range because of accidental formatting, cleaning unnecessary cells and formatting can help.
Always check the Print Preview before export. It is much easier to identify the exact source of a blank page there.
How to Preserve Excel Borders, Fonts, Colors, and Alignment in PDF
Most visible cell formatting is designed to appear in print and PDF output, but the final result can still change when cells are scaled or when a font behaves differently.
To improve consistency:
- Use common fonts that are installed on the system.
- Avoid overly small font sizes.
- Keep border styles consistent.
- Use clear alignment.
- Check row heights after applying Wrap Text.
- Avoid overly complex shapes placed on top of cells.
- Preview the document before export.
If a light-colored font looks fine on your screen but becomes difficult to read in print, change it before creating the PDF.
The purpose of formatting is not decoration. It should make the information easier to scan.
What Happens to Excel Formulas When You Convert the Sheet to PDF?
When an Excel worksheet is converted to PDF, the PDF normally shows the values that are displayed in the worksheet rather than giving the reader an editable Excel formula.
For example, if cell C2 contains =A2+B2 and the visible result is 150, the PDF will display 150. The person reading the PDF cannot normally click the cell and inspect the original formula as they could in Excel.
This is one reason PDF is useful for final reports: the recipient sees the finished information instead of an editable calculation sheet.
If someone needs to review or change the formulas, share the Excel file separately.
Can Charts and Images Be Included in an Excel PDF?
Yes. Charts, logos, shapes, and images can appear in the PDF when they are included in the printable area.
However, always inspect their position.
A chart that looks perfectly placed in Excel can become awkward when the worksheet is scaled or moved onto multiple pages.
Check:
- Chart size
- Chart position
- Image quality
- Text inside charts
- Overlap with cells
- Whether the object is inside the intended print area
For a report with a chart and a table, you may need to adjust the page layout so the chart and related information stay together.
How to Convert Multiple Excel Sheets into One PDF
If a workbook contains multiple worksheets and you want them combined into a single PDF, Excel can often export the selected sheets or entire workbook as one PDF.
Before doing this, make sure each worksheet has been prepared separately.
For each sheet, check:
- Print area
- Orientation
- Paper size
- Margins
- Scaling
- Headers and footers
- Page breaks
A common mistake is to format Sheet 1 correctly and assume the same settings will automatically make Sheet 2 look good. Different sheets can have very different layouts.
If the workbook contains separate monthly reports, for example, each month may require its own print area.
Excel Sheet to PDF: One Sheet or Entire Workbook?
The right choice depends on what you need to share.
| Requirement | Best export choice |
|---|---|
| One worksheet only | Active sheet |
| Several selected worksheets | Selected sheets |
| Entire report workbook | Entire workbook |
| Only a specific table | Selected cells or defined print area |
| Final report for printing | PDF after checking all pages |
Always check the export range before clicking Save.
This is especially important for workbooks that contain hidden calculations, draft pages, or internal notes that should not be shared.
Common Problems When Converting Excel to PDF
Problem: Text becomes very small
Cause: Too much content has been forced onto one page.
Solution: Allow more pages, reduce unnecessary columns, use landscape orientation, or adjust the paper size.
Problem: The last column moves to another page
Cause: The worksheet is slightly too wide.
Solution: Reduce column widths, use Wrap Text, narrow the margins, or set the width to one page.
Problem: Headings appear only on the first page
Cause: Print Titles have not been configured.
Solution: Use Page Layout > Print Titles and select the heading row.
Problem: PDF contains blank pages
Cause: Extra cells, formatting, print areas, or page breaks.
Solution: Review the used range, clear the print area if necessary, and inspect Page Break Preview.
Problem: Some rows are missing
Cause: Filters or hidden rows may be affecting what is displayed.
Solution: Confirm that the visible data is exactly what you want in the PDF before export.
Problem: Table borders look incomplete
Cause: Some cells may not have the expected borders, or scaling can make light borders less visible.
Solution: Apply a consistent border style and preview the printed result.
Problem: The PDF looks different from the Excel screen
Cause: Excel’s worksheet view and printed page are not the same thing.
Solution: Use Print Preview and Page Layout view while preparing the file.
Best Excel Page Setup for a Clean PDF
There is no single perfect setting for every worksheet, but the following setup works as a practical starting point for many normal tables:
| Page Setup Item | Starting Point |
|---|---|
| Paper | A4 |
| Orientation | Landscape for wide tables |
| Margins | Normal or Narrow |
| Width | 1 page for wide tables |
| Height | Automatic for long tables |
| Print Area | Only required cells |
| Print Titles | Repeat heading row for multi-page tables |
| Preview | Check every page |
| Export | PDF after final review |
Treat this as a starting point rather than a rigid rule. A short certificate-style sheet may look better in portrait, while a large analytical table may require several pages.
Practical Example: Converting a Student Marksheet to PDF
Suppose you have a marksheet with these columns:
| Roll No. | Student Name | English | Maths | Science | Total | Percentage | Grade |
|---|
You want a professional PDF for printing.
First, set the print area around the complete table. Next, choose A4 paper. Because the table has several columns, try landscape orientation. Make sure the headings are readable and wrap the longer headings where needed.
If the table is only a few rows long, you may be able to fit it onto one page. If it contains many students, set the width to one page and let the height remain automatic.
Then use Print Preview. Check whether every column appears and whether the first few rows look balanced. If the final PDF is easy to read in Preview, export it.
The same method works for attendance sheets, fee records, exam schedules, and other student documents.
Practical Example: Converting a Job or Recruitment Data Sheet to PDF
Imagine an office or student creates a spreadsheet containing recruitment information with columns such as post name, department, vacancies, qualification, last date, and status.
Because the text in these columns may be long, AutoFit can make the sheet extremely wide.
A better approach is to control the width manually and use Wrap Text for long headings or descriptions.
Landscape orientation may make the table easier to read. For a multi-page document, repeating the header row is especially useful so readers can understand each column on every page.
Before sharing the PDF, check that the table does not reveal internal notes or temporary calculations outside the print area.
Should You Reduce Excel Formatting Before Exporting to PDF?
Not necessarily. You should reduce unnecessary formatting, not useful formatting.
For example, borders that separate columns can improve readability. A clear title can help users understand the document. Bold headings can make sections easy to scan.
On the other hand, excessive colors, very large fonts, decorative shapes, and complicated merged-cell layouts can make a spreadsheet harder to print.
A good PDF usually has a clear visual hierarchy:
- Document title
- Section or column headings
- Main information
- Totals or important notes
- Optional footer or page number
The cleaner the worksheet structure, the easier it is to create a clean PDF.
Excel Page Layout View vs Normal View
Many beginners work entirely in Normal view. That is fine for entering and editing data, but Page Layout view can be very helpful when preparing a document for PDF.
Page Layout view allows you to see page boundaries, margins, headers, and footers in a more print-oriented environment.
This makes it easier to notice that a table is too wide or that a title is positioned awkwardly.
A useful workflow is to use Normal view for data entry and Page Layout or Print Preview for final presentation checks.
When Is Landscape Better Than Portrait in Excel PDF?
Landscape is generally more suitable when the worksheet contains many columns.
Portrait provides more vertical space but less horizontal space. Landscape does the opposite.
Think about how a reader will use the document. If the reader needs to compare information across many columns, keeping those columns on the same page can make the PDF easier to understand.
However, switching to landscape is not a magic solution. If the worksheet contains extremely long text in many columns, you may still need to adjust widths, wrapping, margins, or scaling.
How to Keep a PDF Readable When the Excel Sheet Is Large
A very large worksheet creates a choice between fewer pages and better readability.
Do not automatically try to reduce the entire sheet to one page.
Instead:
- Keep important text at a readable size.
- Remove unnecessary columns from the printable area.
- Use landscape when helpful.
- Repeat the header row.
- Break large sections into logical pages.
- Use page breaks when they improve readability.
- Consider a larger paper size when appropriate.
- Keep related columns together.
For a long report, a well-organized five-page PDF can be far better than a one-page document that nobody can comfortably read.
Common Mistakes to Avoid
Exporting without checking Print Preview
This is the most avoidable mistake. A PDF can contain a layout problem that was obvious in Preview.
Setting everything to one page
This often creates unreadably small text.
Ignoring the print area
Unwanted cells can create blank pages or change the scaling.
Using extremely wide columns
Long columns can force the entire worksheet to become difficult to print.
Forgetting repeating headings
Multi-page tables become confusing when the column names appear only once.
Overusing merged cells
Merged cells are useful for some titles but can complicate table layouts.
Sharing the PDF without opening it
Always open the final PDF and inspect the actual file that will be shared.
Assuming Excel and PDF look identical on every device
The export is usually stable, but the viewing environment, fonts, and printer can still affect how the document is experienced. Review the final PDF rather than relying only on the Excel workbook.
Tips for Students Using Excel for Projects and Assignments
Students often create spreadsheets for school projects, practical work, survey results, attendance, marks, budgets, and data analysis.
A simple routine can improve the final result:
First, complete the data and calculations in Excel. Then clean up the visual structure. Give the table a meaningful title, keep headings clear, adjust column widths, and remove unnecessary content.
Next, set the page layout. Choose the right paper size and orientation. Use Print Preview to inspect each page.
Finally, export to PDF and open the PDF separately before submitting it.
This extra review is especially useful when a teacher, college department, or application portal expects a document that is easy to print or view.
Tips for Competitive-Exam Aspirants and Job Seekers
Excel and PDF are often used together for study planning and application-related records.
For example, you may maintain a spreadsheet containing:
- Exam names
- Application deadlines
- Exam dates
- Admit-card status
- Result status
- Preparation targets
- Mock-test scores
Once the sheet becomes organized, exporting a clean PDF can help you keep a fixed reference copy.
The key is to decide whether the PDF is intended for reading or printing. If you need to carry the document on your phone, slightly larger text and a simple landscape layout may be more practical than squeezing every field onto one page.
Can You Convert an Excel Sheet into PDF Without Microsoft Excel?
Yes, in many situations. Spreadsheet software and online office tools may support PDF export.
However, the exact menus and formatting behavior can differ across applications.
When using an alternative tool, the same principles still apply: define the printable area, choose a suitable page size, check orientation and scaling, preview the result, and inspect the exported PDF.
For sensitive information, avoid uploading confidential spreadsheets to unknown online conversion services. A local application is generally preferable when privacy is a concern.
A Simple Checklist Before You Export
Use this checklist whenever you need to Convert Excel Sheet into PDF:
- Is the correct worksheet selected?
- Is the print area correct?
- Are all required columns visible?
- Is portrait or landscape appropriate?
- Is the paper size correct?
- Are the margins reasonable?
- Is the font still readable?
- Are long headings wrapped properly?
- Do multi-page tables repeat their headings?
- Are page breaks in sensible places?
- Are there any unexpected blank pages?
- Are charts and images positioned correctly?
- Have you checked every page in Print Preview?
- Have you opened the final PDF after exporting?
If the answer to these questions is yes, your chances of getting a clean final document are much higher.
Quick Method to Convert Excel Sheet into PDF
For users who only need the essential process, remember this seven-step method:
- Open the worksheet.
- Set the print area.
- Choose paper size and orientation.
- Adjust margins and column widths.
- Set the worksheet scaling.
- Check Print Preview.
- Export or save the worksheet as PDF.
The important part is step six. Never treat export as the first time you inspect the final page layout.
Important Points to Remember
A few principles will make Excel-to-PDF conversion much easier:
- PDF output follows Excel’s print layout.
- Wide tables often work better in landscape orientation.
- Setting the width to one page can solve horizontal overflow.
- Do not force a large dataset onto one page if the text becomes tiny.
- Print Area controls what Excel includes.
- Print Titles help repeat headings on every page.
- Page Break Preview helps control multi-page layouts.
- Print Preview should be checked before export.
- The final PDF should be opened separately after saving.
- Keep the original Excel file when future editing may be required.
These points apply to a wide range of spreadsheets, from simple classroom tables to formal business reports.
Frequently Asked Questions
How do I Convert Excel Sheet into PDF without losing formatting?
To Convert Excel Sheet into PDF without losing formatting, first set the print area, paper size, orientation, margins, and scaling. Then check Print Preview for all pages before exporting. This helps prevent cut-off columns, blank pages, and unreadable text.
Why does my Excel sheet look different after converting to PDF?
Excel’s worksheet view and printed page are not identical. PDF output is based on print settings such as page size, scaling, margins, page breaks, and print area. Review the document in Print Preview before exporting.
How do I fit an Excel sheet to one PDF page?
Go to the Page Layout tab and use the Scale to Fit settings. You can set the width and height to one page. For large worksheets, it is often better to fit the width to one page and allow the height to use multiple pages so the text remains readable.
Why are some columns missing from my Excel PDF?
The worksheet may be wider than the selected page size, or the print area may not include all required columns. Check the print area, reduce unnecessary column width, use landscape orientation, or set the width to one page.
How do I repeat the Excel heading row on every PDF page?
Use Page Layout > Print Titles and select the row that contains your column headings under Rows to repeat at top. This is useful for long tables spread across multiple PDF pages.
Why is my Excel PDF creating extra blank pages?
Extra blank pages can be caused by accidental content or formatting in distant cells, a large print area, or page breaks. Check the worksheet’s print area and use Print Preview or Page Break Preview to identify the problem.
Can I convert only one Excel sheet to PDF?
Yes. When exporting, choose the active or selected worksheet rather than the entire workbook. You can also define a specific print area if only part of the worksheet needs to be included.
Can I convert an entire Excel workbook into one PDF?
Yes, Excel can export an entire workbook or multiple selected worksheets into a PDF, depending on the version and export options. Review each worksheet’s page layout before creating the final file.
Does converting Excel to PDF keep formulas?
The PDF normally displays the calculated values visible in the worksheet rather than keeping the formulas editable. Anyone who needs to inspect or change the formulas should receive the original Excel workbook.
Can charts and images be saved in the Excel PDF?
Yes. Charts, pictures, logos, and other printable objects can appear in the PDF. Their position and size should be checked in Print Preview because scaling and page breaks can affect how they appear.
Should I use portrait or landscape for Excel PDF?
Use portrait for narrow worksheets and landscape for worksheets with many columns. Choose the orientation that keeps the information readable and minimizes awkward page breaks.
Is it better to save Excel as PDF or print Excel to PDF?
Both methods can work well. The important factor is the page setup and preview rather than the name of the export method. Check the print range, scaling, and page layout before creating the final PDF.
Conclusion
Learning how to Convert Excel Sheet into PDF without losing formatting is mostly about understanding Excel’s page layout settings rather than simply choosing a PDF option. The quality of the final document depends on how you prepare the worksheet before export.
Start with the print area, then choose the correct paper size and orientation. Adjust margins and column widths, use Wrap Text for long headings, and set sensible scaling. For multi-page tables, repeat the heading row and use page breaks when necessary. Most importantly, check every page in Print Preview and open the final PDF before sharing or submitting it.
Once you get used to this workflow, exporting spreadsheets becomes much more predictable. Whether you are preparing a student marksheet, a project report, an attendance list, a recruitment data table, or a professional office report, these simple steps can help you create a PDF that looks organized, readable, and ready to use.
1 thought on “How to Convert Excel Sheet into PDF Without Losing Formatting”